
How to Use Valspar Antiquing Glaze – Today I am servicing a great easy Do It Yourself task so I assumed I would certainly share it and also show you how easy it is to apply antiquing glaze to any kind of product. I am showing you in a terrific frame that I discovered at my regional flea market for only $7. It is an old wooden framework that has great deals of wonderful gesso describing. The application procedure for applying polish coincides whether it’s on an image frame, a furniture piece or on your kitchen area cabinetry. A streamlined summary of exactly how it is done would be: slosh it on then wipe it off … It truly is that easy! But here are the detailed instructions with a couple of vital tips you ought to know.
First, you need to always polish over a satin or a semigloss paint. Note: You don’t want to apply polish to a flat or matte paint surface, as level paint is porous and it would absorb too much of the color pigment. Satin paint is my preferred as it is reduced sheen and it is very easy to wipe and function the polish right into the crevices and information. My framework was an opulent gold when I located it. I initially painted it with a cheap guide then with Rustoleum Spray Paint in Satin Antique White. This paint is among my absolute preferred shades as it is a very clean off-white color. I love to use it on furnishings! It can be located in both spray paint and by the quart. It could occasionally be found at hardware shops, but they seldom appear to have it in stock. (The spray can on the right links to Amazon where you could buy a case of 6 spray containers of paint for only $22). If you do a lot of projects, I suggest getting it in amount as it is cheaper that way! The could below links to the quart which is great for furniture job. I typically roll it on with a sponge roller (I love sponges. lol).
The photo above is the structure sprayed with antique white prior to I used the antiquing polish to it. The above picture is an excellent shot for revealing how tidy the off-white color is.
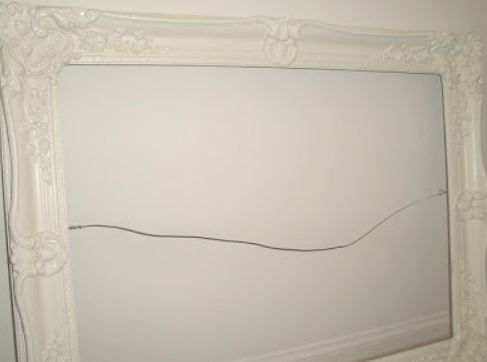
Notice on the pictures below that my structure has lots of age splits and also crevices in the old gesso details. I wanted to make certain all of the information or even the age of the thing showed … as I discover the troubled age so beautiful! That is why I determined to select the antique polish on this charm. It helps to reveal all the terrific information …
I had some Valspar (Lowe’s) Antiquing Glaze from a previous task so that is what I used. It is a water based product so it is very easy to use and also simple to clean up. I utilize a paper plate as a palette (the location to put some glaze to dip my sponge or brush into). It economical, yet I mostly use it since it’s very simple to clean up (which I love!). I just toss the paper plate away when I’m done. I additionally often use sponge brushes as they are like.39 cents each so they are disposable also.
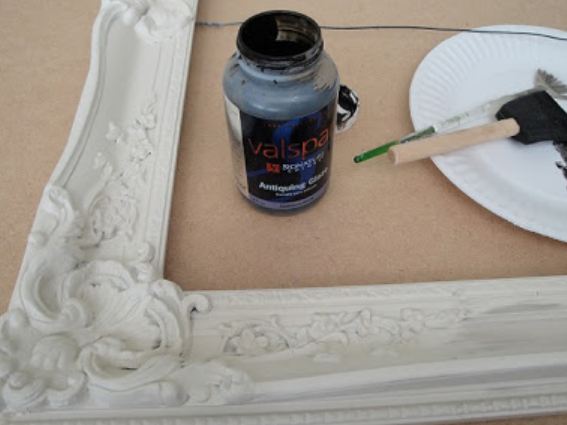
Simply pour some antiquing glaze into the plate/palette and sponge away. I also used a follower brush to obtain the polish into the smaller sized information. Any type of brush would certainly function, I similar to my fan brush somehow.
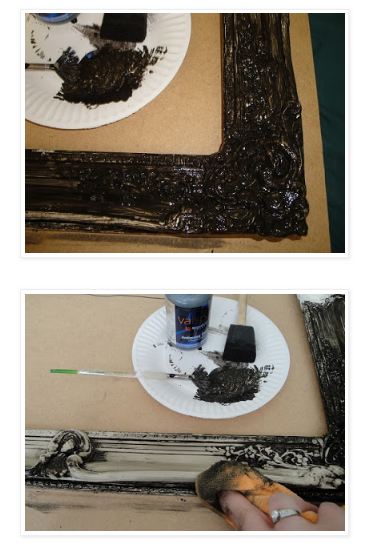
Very first I did a tiny area as a sample test area. Simply brushed the glaze on, then waited a number of minutes. Luster usually provides you an excellent 10 or so minutes to rub out as well as deal with.
After a couple of mins, wipe off the polish (with a soft dry cloth, I such as microfiber … do not use your excellent meal towels, the glaze will certainly tarnish, I maintain some craft towels around that I wash, wash and also re-use). Maintain wiping you achieve a look that you such as. When you get way too much glaze on an area of your towel, you might have to turn or fold up the towel to an additional clean section on it (I wish that made good sense). Your towel will rub out glaze even more easily if the location on the towel you are wiping with if fairly clean. If doing a huge job, you may want to have greater than one wipe towel available. It essentially took much less than 20 seconds to get to this appearance.
Following I kindly applied polish down the side of the frame to a larger location since I had a feel for exactly how very easy it was. It is nevertheless always a great idea to operate in smaller sections instead of doing a whole piece all at once.
Then, I did the exact same brush on, wait a few minutes, rub out … section by section. I just like the means it started looking!
I obtained endure on this bottom edge as well as did a larger section. After that, I obtained a phone call which needed me to leave my task as well as enter into another room to deal with something. It kept me far from my task for 25 or Thirty Minutes. I was a little bit concerned that the glaze might not rub out evenly since I had waited so long. I was right, it really did not intend to rub out as quickly, yet I simply dump a towel, wrung it out, then rubbed out the polish as before. The dampness on the towel softened up the polish allowing me to clean it quickly … (Thank God!).
Keep in mind: If I were doing a furnishings item with a polish. I would certainly secure it with a polyurethane (clear coating) over it to shield it (as the polish can scrape off or scrape). Being that my structure will be hanging on a wall, I don’t really feel the should clear coat it.
Here it is … I ended up Frame after applying the antique glaze. I definitely love just how it ended up!
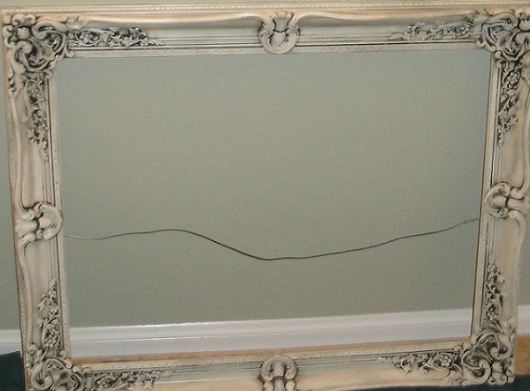
Tomorrow I will be dealing with what goes inside this framework. Extra photos will be published when I am completed.


