
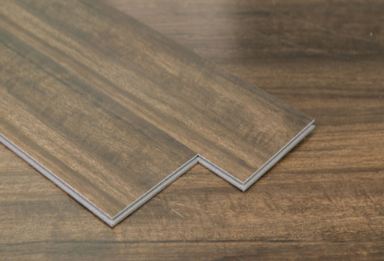
How to Install Peel and Stick Vinyl Plank Flooring – Peel vinyl tile and stick are a popular floor option for DIY owners. They look like traditional vinyl but do not require separate d`adhésif. This makes them much easier to install, and tends to reduce the amount of cleaning required. Peel and stick tiles can be installed on almost any type of subfloor, but it is important to prepare the ground first to avoid problems with your tile floor. When installation on existing oriented strand board (OSB), a sub-layer must be added between the OSB panels and tiles. This is due to the tendency of OSB to swell and the chain along the seams over time, which could eventually show through the vinyl flooring.
How to Install Peel and Stick Vinyl Plank Flooring
Things You’ll Need
- Tape measure tiles
- Peel and Stick 1/4 “plywood support angles
- Underlayment
- Hammer joint compound
- Trowel marker
- Cordeau vinyl tile cutter
- Utility Knife right edge
- Cut or floor panels (optional)
- Roll of soil
Step by Step
- Measure the size of the room to calculate the amount of material you will need to purchase. Multiply the length and width to determine total area. Make sure to buy about 5 percent more than the tile you plan to use, as some material will be lost as you cut the tiles to fit around the obstacles. It is also useful to keep the tiles extra around the repairs.
- Cover the OSB sub-floor assembly with a layer of 1/4 “plywood support. Leave a Light (1/16 “) between each plank so that the plywood can expand and contract over time. Offset the joints on the plywood so that they are not aligned with the OSB panel.
- Attach the plywood by means of OSB studs every 8 inches along the seams.
- Cover the seams of the underlayment using the joint compound. Diffuse this material in a thin layer using a trowel. Allow the joint compound to dry completely before installing your tiles. This makes it possible to avoid seams on the plywood to telegraph through the vinyl.
- Find the center point of each wall and draw a chalk line from each wall to its opposite. This will help you locate the center of the room.
- Layout your tiles from the center of the room. This will ensure that the floor looks even and straight, even if the walls are not square. Do not remove the paper support from the tiles. Determine which model you will then use the diving tiles to facilitate installation.
- Peel the paper support from each tile and hold it firmly on the floor, from the center of the room. Keep the tiles aligned with the chalk lines created in step 5. Butt The nearby tiles, keeping them square and even.
- Cut the tiles as needed using a vinyl tile cutting device or a knife and the right edge.
- Roll the floor using a 100 pound floor roll, once all the tiles are in place. The floor roller will remove the air bubbles under the tiles and ensure that they are firmly bonded with the subfloor. Add the trim or molding around the perimeter of the room as desired to complete the project.
(Visited 222 times, 4 visits today)


